Showing posts with label chocolate. Show all posts

Thursday, May 19, 2011

Peanut Butter Pretzel Bites

1 cup creamy peanut butter
2 tbsp softened butter
1/2 cup powdered sugar (maybe more)
3/4 cup brown sugar (maybe more)
Pretzels
1 bag  semi-sweet chocolate chips

Combine peanut butter and softened butter in a large bowl with a fork or whisk, or in a stand mixer.  Add the sugars and mix to combine.  At this point if the filling will roll easily into balls without sticking to your hands you’re ready to go.  If not, add a little more of each sugar until you reach a consistency that is easy to roll (I used about 3/4 cup of each sugar).

Use a teaspoon measure to scoop the filling.  Roll each portion into a small ball, then sandwich them between two whole pretzels.  When all the balls are rolled and successfully sandwiched, stick the whole tray in the freezer for about half an hour.

Pour the chocolate chips into a microwave safe bowl and heat at 30-second intervals, stirring occasionally until completely melted.  Remove the pretzel sandwiches from the freezer and quickly dip each half-way into the melted chocolate.  Return to the tray and repeat with remaining sandwiches.  When all are dipped, return the tray to the freezer to set up completely.  Store the sandwiches in the refrigerator until serving time.

Cook's tip:  I used 3/4 cup of powdered sugar instead of 1/2 cup.  The dough wasn't thick enough with just 1/2 cup.  I also learned that refrigerating the dough before rolling it into balls and putting it between the pretzels made the process quite a bit easier.  I dipped half of the batch in milk chocolate and half in semi-sweet and surprisingly I liked the semi-sweet better.  Also, I made the mistake of accidentally buying unsalted pretzels.  Although the bites were good using unsalted, I think they would be better with salted. 

From whence it came:  My cute as can be married daughter found this recipe while stalking the blog of one of her cute friends.  My married daughter called me and told me about these and I just had to try them.  My married daughter is on my good list, not only for sharing this great recipe, but for being just as sweet as this great recipe.  Do you know that she calls her momma just about every single day to check in and say hello?  Do you know how much that means to her momma?  More than words on this silly little blog could ever express.  Oh how I love my married daughter, and oh how you'll love these pretzles!

Why it's blogable:  The combination of sweet and salty is a winner as far as I'm concerned.  You combine pretzels and chocolate and I'm gonna sit right down next to you and be your best friend.  At least until the pretzels and chocolate are all gone.  Then you go and put peanut butter into the mix and you've got yourself one sensational recipe.  These little bites might be a process to make, but they're not hard, and they're worth the effort.  The Spy Who Loves Me and my teen son totally and completely agree!

Click here to get the printable:
Peanut Butter Pretzel Bites

Hope you enjoy stirring it up!

Wednesday, April 13, 2011

Chocolate Cookie Pretzels

 Ingredients

    2/3 cup butter, softened
    1 cup sugar
    2 teaspoons vanilla extract
    2 eggs
    2-1/2 cups all-purpose flour
    1/2 cup HERSHEY'S Cocoa
    1/2 teaspoon baking soda
    1/4 teaspoon salt


Directions

     Heat oven to 350°F.

     Beat butter, granulated sugar and vanilla in large bowl unilt fluffy. Add eggs; beat well. Stir together flour, cocoa, baking soda and salt; gradually add to butter mixture, beating until well blended.

     Divide dough into 24 pieces. On lightly floured surface, roll each piece with hands into pencil-like strip, about 12-inches long. Place strip on ungreased cookie sheet. Twist into pretzel shape by crossing left side of strip to middle, forming loop. Fold right side up and over first loop. Place about 2 inches apart on cookie sheet.

     Bake 8 minutes or until set. Cool 1 minute; remove from cookie sheet to wire rack. Cool completely. Sprinkle with powdered sugar, if desired.

Here's how you form the pretzels:

From whence it came:  I found this recipe, many years ago, in the Hershey's Make It Chocolate cookbook.  One day I decided to give it a try, and it has been a family favorite ever since.  Sometimes I sprinkle them with powdered sugar, but usually we just gobble them down plain.  And when I say gobble, I mean gobble!

Why it's blogable:  My kids love love love these cookies.  Right this very second my teen son is begging me to make these for him.  And when my teen son begs, I tend to listen.  He's a good boy.  A really really good boy.  He makes me happy, and I want to make him happy right back.  So I'm gonna bake him up a batch of these cookies and sit back and enjoy the happiness.  Oh, and in case you're wondering about The Spy Who Loves Me, he is a humongous fan of these cookies.  They are one of his all time favorites, too.

Click here to get the printable:
Chocolate Cookie Pretzels

Hope you enjoy stirring it up!

Friday, December 17, 2010

Aztec Dessert

1 package Oreo cookies
1 stick melted butter
1/2 gallon ice cream, any flavor
Hot fudge sauce
1 8 oz. Cool Whip

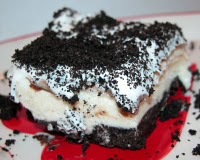
Crush Oreos in large zip lock bag.  Reserve 1 cup and add melted butter to remaining Oreos.  Press into bottom of 9x13 pan.  Freeze for about 20 minutes.

Top Oreo crust with ice cream.  I normally remove ice cream from carton and slice with a big knife, then place it onto the crust.  You can also soften the ice cream and spread it over the crust.

Top with hot fudge sauce that has been cooled to room temperature, then spread Cool Whip on top.  Sprinkle remaining Oreos on Cool Whip.  Place in freezer for at least one hour.  Cut into squares and serve.

From whence it came:  We all need to bow down and kiss the feet of my sweet sister-in-law, Geralane, and thank her for this over-the-top, to-die-for recipe!  She has given me many great recipes over the years, but this one stands alone.  It's amazing, just like Geralane!

Why it's blogable:  A few reasons:  Oreos, butter, ice cream, Cool Whip and hot fudge!  Can you think of a better combo?  I didn't think so.  This recipe is a hit 100% of the time.  Everyone loves it, and it's very easy to make.  It's perfect for the holidays.  If you make it with peppermint ice cream it is wonderful, and so so pretty.  The Spy Who Loves Me has over the years requested it for his birthday cake.  It's great with Mocha Almond Fudge ice cream, or cookies and cream, or mint chip, or really any flavor you like.  You can't go wrong with this recipe, unless you decide not to make it.  That would be wrong.  Very wrong!

If you want to simplify the recipe, you can buy hot fudge sauce rather than make your own.  The original recipe calls for store bought sauce.  And it's good that way, but it's better with this sauce.  And cheaper, too.  Either way, you're gonna love this recipe!

Click here to get the printable:
Aztec Dessert

Hope you enjoy stirring it up!

Tuesday, September 21, 2010

Easy Caramel Pecan Brownies

1  pkg.  (19 to 21 oz.)  brownie mix (13x9-inch pan size)
1 pkg. (11 oz.) KRAFT Caramel Bits
1/3 cup whipping cream
2 cups pecan Halves, divided

PREHEAT oven to 350°F. Line 13x9-inch baking pan with foil, with ends of foil extending over sides of pan. Generously grease foil. Prepare brownie batter as directed on package; spread half of the batter into prepared pan. Cover remaining batter; set aside.

BAKE 20 min. or until top is firm to the touch. Meanwhile, microwave caramel bits and whipping cream in medium microwaveable bowl on HIGH 2 min., stirring every 30 sec. or until caramel bits begin to melt; stir until completely melted. Add 1 cup of the pecans; mix well. Spread over partially baked brownie; top with remaining brownie batter. (Some caramel may peek through batter.) Sprinkle with remaining pecans.

BAKE an additional 25 min. or until top is firm to the touch. Cool completely. Use foil handles to lift dessert from pan before cutting to serve. Store in covered container at room temperature.

From whence it came:  I found this divine recipe on the back of the Kraft Caramel Bits package.  I thought it looked yum-e, and I was right!  I bought the Caramel Bits at Super Walmart.  You can probably find them wherever you shop.
Why it's blogable:  If you're into chocolate mixed with nuts and ooey, gooey caramel, I don't need to tell you why it's blogable.  Is there a better combination than chocolate, caramel and nuts?  I think not!  These very easy to make, and my family went nuts for them.  Get it?  Nuts for them!  They have nuts!  Get it?  The Spy Who Loves me was especially head over heals for these brownies.  Oh, and did I mention the edges?  The edges are kinda crispy and gooey all at the same time.  The edges have got it goin' on!  This recipe is similar to this recipe, but different enough that they both deserve a place of honor on my little blog.

You can print it here if you want to!

Hope you enjoy stirring it up!

Wednesday, September 15, 2010

Hot Fudge Sauce

8 ozs. semi sweet chocolate chips
10 T. butter
½ c. unsweetened cocoa powder
1 ½ c. sugar
¾ c. water
½ c. light corn syrup
4 t. vanilla extract

In a heavy saucepan, combine the chocolate, butter, cocoa, sugar, water and corn syrup.  Wisk over medium-high heat until the chocolate and butter are melted and the sugar is dissolved.  When the sauce just comes to a boil, reduce the heat to low and cook at a low boil for 8 to 10 minutes; the sauce will thicken as it cools.  Add the vanilla and stir to combine.  Store in refrigerator tightly covered.

From whence it came:  I'm not gonna tell ya!  Here's the deal.  I found this recipe in a cookbook, but I changed it and, in my opinion, made it better, so I'm going to take the credit for this one.  A teeny tiny bit of credit goes to that skinny lady who bakes really good cookies, but the rest of the credit goes to that not so skinny lady who writes this blog.  And that's all I'm gonna say about that!

Why it's blogable:
  Because it's the best hot fudge sauce I've ever tasted.  Oh, and it's so easy to make.  And did I mention that you can just eat it with a spoon?  I'm not saying that I'm speaking from experience, I'm just saying you can.  And if you make it, you probably will.  And if you don't, something is very wrong with you.  Seek help!  You have issues!  Maybe I'm the one with issues.  Either way, you've just gotta try this on ice cream.  Or with a spoon.  Now let's not go there again!

If death by chocolate sounds fun:  Make these brownies then top them with a scoop of ice cream and pour this fudge on top.  You'll die with a smile on your face!

Hope you enjoy stirring it up!

Wednesday, September 8, 2010

Alan Jackson's Chocolate Cake and Frosting

Cake:
2 cups flour
2 eggs
2 cups sugar
1/2 teaspoon salt
1 cup water
1 cup butter ( divided)
1/2 cup vegetable oil
1/2 cup cocoa ( divided)
1/2 cup buttermilk
1 teaspoon baking soda
2 teaspoons vanilla ( divided)
1 teaspoon cider vinegar
6 tablespoons milk
1 (16 ounce) box powdered sugar

Sift flour, sugar and salt together in mixing bowl. Heat water, 1 stick butter, oil, 1/4 cup of the cocoa. Boil, stirring constantly. Pour into flour mixture and stir until smooth. Blend in buttermilk, eggs, baking soda, 1 teaspoon of the vanilla and vinegar until smooth. Pour into a greased and floured 13x9x2 inch baking pan. Bake at 350 degrees F for 35 minutes or until a toothpick inserted in center comes out clean. Cool completely.

Frosting:
In a sauce pan, over medium-high heat, melt remaining 1 stick of butter, add the milk and the remaining 1/4 cup cocoa and bring to a boil. Remove from heat. Stir in powdered sugar and the remaining 1 teaspoon vanilla. Stir until smooth. Pour over the cake. Enjoy!

From whence it came:  I searched the Internet this past weekend for a new chocolate cake recipe and this one popped out at me, so I just had to try it.  I am a lover of country music!  Those country music folks really do know how to cook.  Tim McGraw (who I love more than chocolate chip cookies) is famous for his Chicken and Dumplings.  Trisha Yearwood has her own cookbook!  And Alan Jackson has this yum-e chocolate cake!

Why it's blogable:  This cake is a lighter chocolate cake than this cake, but it is still really good.  The frosting is almost exactly like this frosting.  It hardens up like fudge and has a great flavor.  It was really easy to make and everybody licked their lips...and their plates...when they were done!

Breaking news:  I'm so happy!  A few days after I made this cake my teen daughter told me that she really likes it and that it has replaced that ridiculous Funfetti Cake as her favorite cake.  I'm giddy!   Positively giddy!

Click here to get the printable:
Alan Jackson's Chocolate Cake and Frosting

Hope you enjoy stirring it up!

Monday, August 23, 2010

Cookies and Cream Chocolate Cake


  • Butter, for greasing the pans
  • 1 3/4 cups all-purpose flour, plus more for pans
  • 2 cups sugar
  • 3/4 cups good cocoa powder
  • 2 teaspoons baking soda
  • 1 teaspoon baking powder
  • 1 teaspoon salt
  • 1 cup buttermilk, shaken
  • 1/2 cup vegetable oil
  • 2 extra-large eggs, at room temperature
  • 1 teaspoon pure vanilla extract
  • 1 cup freshly brewed hot coffee
Preheat the oven to 350 degrees F. Butter 2 (8-inch) round cake pans. Line with parchment paper, then butter and flour the pans.
Sift the flour, sugar, cocoa, baking soda, baking powder, and salt into the bowl of an electric mixer fitted with a paddle attachment and mix on low speed until combined. In another bowl, combine the buttermilk, oil, eggs, and vanilla. With the mixer on low speed, slowly add the wet ingredients to the dry. With mixer still on low, add the coffee and stir just to combine, scraping the bottom of the bowl with a rubber spatula. Pour the batter into the prepared pans and bake for 35 to 40 minutes, until a cake tester comes out clean. Cool in the pans for 30 minutes, then turn them out onto a cooling rack and cool completely.

Filling and Frosting:
1 carton Frostin' Pride (quart size carton)
1 package Oreo cookies, crushed, but not too tiny

Mix the Frostin' Pride in your mixer with the wisk attachment as directed on carton.  Mix half of whipped Frostin' Pride with crushed Oreo cookies and reserve other half for frosting.  Spread Oreo filling on top of one layer then top with the other layer.  Frost entire cake with remaining Frostin' Pride.  Store in refrigerator until serving.

From whence it came:
  There are a few people who get credit for this amazing cake.  And when I say amazing, I'm not kidding!  First, one of my very favorite Food Network Stars, The Barefoot Contessa (Ina Garten), gets credit for the cake recipe.  It is quite honestly the best chocolate cake I have ever made.  It is very dense and seriously moist, which, like I've said before, is good if you're a cake, not so great if you're a person.  I adore The Barefoot Contessa.  She's my second favorite, after my BFF, Paula Deen.  These two ladies are very different, but I love them both.

Next is the filling.  Two people get credit for this heavenly concoction.  When I was trying to figure out a twist on a chocolate cake for my daughter's wedding last summer I put a post on my Facebook asking for suggestions.  A wonderful girl who I love more than peanut butter, Lauren Stange, suggested a Cookies and Cream Cake, and I knew immediately that it was a genius idea.  Next comes into play another cake wizard, my fabulous Aunt Joyce, who is also responsible for Joyce's Buns.  Joyce's talents go far beyond her buns, they go all the way to filling and frosting wonderful cakes.  Aunt Joyce told me about Frostin' Pride and suggested we use it for the filling and the frosting.  It was a very good suggestion!  If you've never used Frostin' Pride, you must.  And don't wait long before you do.  It's the easiest thing you'll ever do, and people will love you for it.  All you do is buy a carton of the stuff and whip it up.  Here in sunny San Diego I buy it at Smart and Final, but if you aren't fortunate to have a Smart and Final near you, you can probably get it from a cake decorating store.  You find it in the refrigerator section and it can be frozen and then thawed before you whip it.  If you can't find Frostin' Pride you can use Pastry Pride and I'm sure it will work just fine.  They are both delish!  And if you don't want to use either, I think this frosting would be amazing on this cake.  I'm going to make cupcakes with this cake recipe soon and frost them with this frosting and I'll let you know what I think.  I have a feeling the reviews will be REALLY good.  Also, you don't have to make it a cookies and cream cake.  You can just make it a chocolate cake and frost it with whatever icing you like.  This cake recipe will be fabulous no matter what you do with it!

Why it's blogable:  I think this may have been the favorite cake flavor of the four cakes I made for my daughter's wedding.  I took the leftover cake to church the following Sunday and people sang the Hallelujah Chorus after taking just one bite.  I'm not bragging folks, I'm giving all the credit to the genius women who thought this up, and they deserve a lot of credit.  My sonny-in-law's dad, who is now my daughter's father-in-law, was especially fond of this cake.  I just made another one and took it on dry ice to Utah to celebrate my sonny-in-law's graduation. Also, this past April, one of my favorite people and a great friend of my married daughter got hitched himself, and when I offered to make the wedding cakes, this is one of the flavors he chose.  And it only took him a half a second to make up his mind.  He remembered eating it at my daughter's reception and he was sold.  I'm not kidding when I tell you that this cake is a winner!

A few other thoughts:  Coffee!  Are you a moron like me?  Did I say moron?  I meant to say Mormon!  Silly slip of the computer keys.  I guess I've just been called a moron so many times that it comes out very naturally.  Anywho, I am a Mormon, and Mormons do not drink coffee.  Please don't write me letters about all the Mormons you know who drink coffee.  I know, some do, but most don't.  And I don't.  But I do always have a container of instant decaffeinated coffee granules in my freezer for occasions such as this.  Here's a REALLY BIG TIP that I learned from The Barefoot Contessa.  She is such a smarty!  She says, and it's true, that if you add coffee to chocolate, it enhances the flavor.  And boy oh boy is she right!  If you add a little bit of coffee, about a rounded teaspoon or so, to the water before adding the water to your brownies, you will have yourself some of the best brownies you've ever tasted.  You won't taste the coffee, just like you won't taste it in this cake, but the flavor will be fabulous! For this cake I just mix the dry coffee crystals with hot water and that's that.  I doubt it matters that the coffee isn't brewed.  But if you're not a moron, oops, I mean Mormon, and you have freshly brewed coffee, then by all means, go for it!

Also, when I have made this cake for weddings and graduations I have made it in a half sheet pan.  This is what I do:  I double the recipe twice.  So, I mix up a double batch and bake it in a half sheet pan.  Then I remove the cooled cake and do it again.  Kind of like lather, rinse and repeat.  Only don't use any soap.  The Spy Who Loves Me swears that soap gives you the runs.  Sorry to be so gross and graphic, but The Spy swears it's true.  If he is in the kitchen while I'm doing dishes, or helping with dishes, and if he sees so much as a teeny tiny bubble on any pan or dish that has already been rinsed, he will freak out and scream like a little girl.  The Spy is a little over the top about some things, and bubbles are on that list!  How did we get from blogging about delicious chocolate cake to bathroom issues?  I'm so very sorry.

Why didn't I share this recipe sooner?  I was waiting for a special occasion.  And because I feel so guilty for taking a vacation and not blogging for a couple of weeks, now is the time for me to share this recipe, and it's my way of thanking you for your blog stalking loyalty.  The advice about the soap was just an added bonus.  You're welcome!

Click here to get the printable:
Cookies and Cream Chocolate Cake

Hope you enjoy stirring it up!

Wednesday, August 4, 2010

Karen's Chocolate Frosting

In saucepan melt 1/2 c. butter.  Add 4 T. cocoa and 5 T. milk to melted butter and bring to a boil.  Remove from heat and pour over one box of powdered sugar.  Add 1 t. vanilla and chopped nuts if desired.  Beat with mixer until smooth.  Pour immediately over cooled cake.

From whence it came: 
Karen!  Oh how I love this lady.  Karen Perkins is one of my favorite people in the whole wide world!  She was like a second mom to me when I was growing up.  I am truly blessed to have a wonderful mom, and doubly blessed to have a wonderful second mom.  Karen had such a profound impact on my life.  I am a better person for knowing her.  I love you, Karen Perkins!  You are a hero to me!

Why it's blogable:  This frosting is more like fudge.  It's like having a piece of fudge on top of your cake.  Cake and fudge in the same bite?  Now that's what I call heaven!  It's so easy to make and everyone just loves it!  I made it tonight and poured it over this chocolate cake.  And then I took it to a church dinner.  And I didn't bring a single piece home because it was all gone.  Because it's so good!

Here's a cake tip for y'all:  My friend, Janice, taught me that if you bake a box cake for one hour at 300 degrees it will turn out amazing every time.  Let me tell ya, Janice is right!  Just mix up a box cake mix and pour it into a 9x13 pan, bake for an hour at 300 and you will have yourself one yum-e cake.  Don't worry, it won't be dry.  It will be oh so good!  Then all you have to do is make this frosting and pour it on top and stand still while everyone kisses your feet for making such a fabulous cake!  (Be sure and get a pedicure, first!)

Here's the printable:
Karen's Chocolate Frosting

Hope you enjoy stirring it up!

Monday, July 5, 2010

Rice Krispie-Peanut Butter Treats


1 c. Karo syrup
1 c. sugar
1 c. peanut butter
6 c. Rice Krispies
1 c. butterscotch chips
1 c. chocolate chips

Mix Karo and sugar together in medium saucepan. Bring to a boil and boil 1 minute. Remove from heat. Add peanut butter, mix well. Pour over cereal. Flatten into lightly greased 9 x 13 inch pan. Melt butterscotch and chocolate pieces together over low heat or in microwave, stirring after each minute. Spread over treats. Cut when cool.

From whence it came:  Google!  I just love Google, don't you?  A friend of ours named Brett McNamara (AKA The Miracle Man) makes cookies very similar to these and they are fabulous so I did a Google search and came up with this super yum-e recipe!  Why The Miracle Man, you ask?  Well, Brett truly is a walking miracle.  Two years ago he was in a terrible boating accident.  He came about as close to death as a person can without leaving this earth.  Through the love of his fabulous family and the prayers of so many people who adore him, he was healed by what can only be called a true miracle, and now every time I see him I say to myself, "There's the miracle man."  And he truly is!

Why it's blogable:  I know.  I know.  This is not an original recipe.  Lots and lots of people already have this recipe or a recipe very similar to it.  But just in case you don't, I needed to post it so that now you do.  My kids just go crazy for these cookies.  The married daughter and sonny-in-law have been known to eat almost a whole pan of them in one sitting.  My teen son skips and screams with joy when he sees me making these.  (He's gonna murder me in my sleep for saying that!  He doesn't really skip or scream, but I feel sure he wants to and has to strongly resist.)  Even my very cool and stoic teen daughter gets a bit giddy when I stir up a batch of these puppies.  And The Spy, he's a big fan, too!  

A little variation:  Some people use Special K cereal when making these cookies.  They are good that way, too.  I always use Rice Krispies.  No reason, I just do.

Hope you enjoy stirring it up!

Friday, July 2, 2010

Almond Joy Cookies

2 c. flour
1 t. baking soda
¼ t. salt
2 sticks butter, softened
¾ c. packed light brown sugar
¾ c. sugar
2 large eggs
2 t. vanilla
1 t. almond extract  (I never use this, I don't like the flavor of it!)
2 c. shredded coconut
2 c. semisweet chocolate chips
1 ½ c. roasted almonds, finely chopped

Preheat oven to 300 degrees.  Cream butter and sugars then add eggs and vanilla.  Blend in flour, soda and salt.  Add coconut, chocolate chips and almonds.  Drop dough by rounded tablespoons 2 inches apart onto an ungreased cookie sheet.  Bake 18-20 minutes, or until set. Makes about 4 dozen cookies.  (Who is she kidding?  It makes about 2 ½ dozen…that’s why I always double the recipe.)

From whence it came: 
I don't want to tell you.  I really don't!  I want to say that I made up this recipe because it is one of the best cookie recipes of all time and I want to take all the credit.  But I am just too honest for my own good.  So I have to admit that I found this in a Mrs. Fields Cookbook.  It pained me to type that last sentence.  How could someone so skinny make up such a great recipe?  It bothers me that Mrs. Fields has become ridiculously rich making cookies and she is still skinny!  Sometimes life just isn't fair!


Why it's blogable:  Do you remember when I had my first giveaway a while back?  These were the cookies that I made for my very first giveaway.  That should tell you how great they are!  This is probably my most famous and beloved cookie recipe. I used to sell these cookies (it's a long story for another time, picture me pulling a cooler through the business districts of Oceanside...it wasn't pretty) and one guy that I sold them to called me the "crack dealer" because every time I would walk through his front door he just had to buy these cookies, just as if he were addicted to crack. He simply couldn't resist.

Why now:  I decided to post this recipe today because today is my 50th birthday and I wanted to celebrate by giving all of you this divine cookie recipe.  You deserve a gift.  You have made me happy by stalking my blog.  You have brought joy to my life by trying my recipes.  So to say thanks, here's a recipe you simply must try.

Hope you enjoy stirring it up!

Monday, June 21, 2010

Chocolate Cream Pie

This is what I made for The Spy Who Loves Me for Father's Day.  It's not really an official recipe, and it's so easy that it's almost embarrassing to post it on this blog, but I'm without pride so I'm just gonna go for it.

Graham Cracker Crust:
Crush 3/4 of a box of graham crackers
(This is not an exact measurement.  It's close.  Use more or less, depending on how thick you like the crust.  The Spy likes it thick.  Really thick.  So I used almost a whole box and a big pie pan.)
I put the graham crackers in a gallon zip lock and beat them with a rolling pin.  This is cheaper than therapy and way more effective!  How would I know?  I've never had therapy, although many people, mainly family members, have suggested I should.  And I just want to say, for the record, that I am not the crazy one.  They are the crazy ones!  I am perfectly normal.  Perfectly!

Where was I?  These people are driving me crazy!  I can't even think with all of them talking to me at once.  (Does it concern you that I'm totally alone right now?  Me neither!)

So, crush those graham crackers, and enjoy beating them silly.  I think the crust is good and looks pretty if some crumbs are bigger than others.  Some of my crumbs were more like chunks, and I think that's perfectly fine.  If you are into uniformity then you can put them in the food processor and grind them to death, but where's the fun in that?  Just whack 'em.  I might make another pie just so I can whack more crackers!

Once they are properly whacked, add 4 T. sugar and 1 stick melted butter.  Give it a stir.  When I made this pie on Saturday I threw caution to the wind and added even more butter.  Yes I did.  I actually made two pies, one to take to church, and one for home, so I whacked two boxes of crackers and then had too much, so I froze some of the whacked crackers.  I have the feeling I'm giving you too much information and that by now you've either switched over to The Pioneer Woman's website or you're just barely hanging on to see if I ever get to the point.  Don't fret, I'm almost there!

Once you've mixed the whacked crackers, sugar and butter, you pour it into your pie pan and firmly smash it down.  I used a cup to really give it a good smashing.  Come to think of it, this is a very violent recipe.  That's probably why I felt so good after making it!

Press the crust mix into the pan and bake at 325 degrees for ten minutes.  That's it.  Pie crust done.  Check!

Filling:
Now to fill it.  This is where the difficult level gets ridiculously ridiculous!  This is where I totally swallow my pride and tell you that it's chocolate Jello pudding.  That's it.  Nothing more.  And even worse, it's the instant stuff.  Just one large box of pudding mixed with two and a half cups of milk.  My pie pan was really big.  Gigantic actually.  So I used two large boxes of pudding.  But for most pies, the ones that aren't on steroids, you only need one box.

Let it gel slightly, just for about five minutes, then pour it into the cooled crust.  Cooled!  Don't put it into a hot crust.  That could get ugly!

Final touches:

Put it in the fridge for at least a couple of hours.  Mine was in there overnight.  When you're ready to serve it, top the whole thing with an 8 oz. container of Cool Whip.  How embarrassing.  I didn't even make real whipping cream.  What a loser!  Who cares!  It was delicious!

Just to be a show off, and to make it look like I worked harder than I did, I grated part of a chocolate candy bar on top.  It adds nothing except the WOW factor.  I'm all about the WOW factor!

From whence it came:  All those people in my head talked me through this one.  Just kidding!  My mother-in-law used to make this pie for The Spy when he was just a little tyke and now he forces me to make it.  More like begs me to make it.  And, because I'm wonderful, I do it.  (Actually, whenever he wants me to do something he threatens to hide my Tim McGraw CDs.  That always gets my attention!)

Why it's blogable:  My teen daughter totally turns her nose up at pie.  Today, the minute she walked in the door from work, she went straight to the fridge (before eating lunch, which is against my rules, which if I had any power over her at all I would never allow, but I don't, so she did).  She pulled out the pie and cut herself a slice and ate it while I lectured her on the pitfalls of eating pie before a meal.  Then she licked her lips and that was that.

Now that your suspisions of my being completly insane have been confirmed, you should trust me on at least one thing.  This pie is good!  I promise!

Hope you enjoy stirring it up!

Wednesday, May 19, 2010

Chocolate or Lemon Bundt Cake...you decide!


1 package deep chocolate cake mix
1 4 oz. package instant chocolate pudding
½ pint sour cream
½ c. oil
½ c. warm water
4 eggs
1 12 oz. package chocolate chips
Powdered sugar to sprinkle

Mix all ingredients, except powdered sugar, until well blended. Pour into well greased Bundt pan. Bake at 350 degrees for 50-60 minutes. Cool in pan for 10 minutes, then turn out on serving plate. When thoroughly cooled, sprinkle with powdered sugar.


Lemon Bundt Cake

One day I was thinking about this recipe and I wondered how it would be if it were lemon. It was one of my better ideas! Just use the same recipe above except use a lemon cake mix and lemon pudding. Omit the chocolate chips.

Lemon Glaze

Mix 1 cube softened butter with 3 c. powdered sugar and 1 t. vanilla. Add enough fresh lemon juice to make it the desired consistency. I like my glaze kinda thick.

From whence it came: I got this winner of a recipe out of a cookbook put together by teachers. It is a compilation of their favorite recipes. And do you want to hear something strange? It's the only recipe I've ever made out of the cookbook. I don't know why. Nothing against teachers, I'm sure they are great cooks. I've just never tried any other recipe. This one recipe makes the entire book worth having! It's good!

Why it's blogable: This recipe is very easy to make, and it turns out great every single time. The cake is dense and moist, which is a great combination if you're a cake, not so great if you're a person. Also, it makes 24 slices, which is quite a few, so it's great to take to a potluck or party. People will ask you for the recipe, and you should share. Sharing is good!

Chocolate or Lemon?: Get ready to hear a clap of thunder from the heavens above because I'm about to say something that goes against every fiber of my being. I like the lemon better. There, I said it. I am the world's biggest lover of all things chocolate. I have yet to meet a chocolate anything that I didn't like...love! But for some reason, I like the lemon cake better. Don't misunderstand, the chocolate is really good. Really! But there's just something about the lemon that calls out my name. And I answer! I think it's the icing that makes it so good. It's a bit tart, which is such a great combo on top of the sweet cake. I just really love this lemon cake. And it's pretty! Did I tell you it's pretty?
It is!


Hope you enjoy stirring it up!

Saturday, May 8, 2010

Peanut Butter Chippers


1/2 c. butter
1/3 c. peanut butter
2/3 c. sugar
1/3 c. brown sugar
1 egg
1/2 t. vanilla
1 c. flour
1/2 t. baking soda
1/4 t. salt
2 c. Rick Krispies
1 c. chocolate chips

Cream butter, peanut butter and sugars. Add egg and vanilla. Mix until thoroughly blended. Combine flour, baking soda and salt and add to mixture. Mix well. Stir in chocolate chips and Rice Krispies. (Don't mix them too long or the Rice Krispies will turn to dust.) Drop onto greased baking sheet. Bake at 350 degrees for 10-12 minutes or until lightly browned.

From whence it came: This recipe came from a church cookbook, and in my opinion you just can't beat church cookbooks. Everyone posts their very best recipes because no one wants to be known as the person who posted that yucky recipe! Everyone, that is, except the person who in a church cookbook once posted the yuckiest meatloaf recipe of all time. I can't remember that person's name, I have blocked it from my phych-e, but whoever they are, they have a rotten meatloaf recipe on their hands! I made it years ago and barely lived to tell about it. I wrote the word YUCK in the cookbook next to the recipe so I would never make that mistake again. Anywho, a great gal who has a reputation as a fabulous cook gets the credit for this cookie recipe, and trust me, it's far from yucky. Barbara Davis is the generous soul who shared this one and when you make them you'll want to thank her personally. She and her husband, Bob, are two very kind and generous souls. I've heard from many people how good they are at reaching out and helping others. What a great thing to be known for! And then to be known as a great cook on top of it, well, that's pretty wonderful! Thanks for sharing this great recipe, Barbara. And more importantly, thanks to you and Bob for all you do for others!

Why it's blogable: People just love these cookies! The Rice Krispies are a great touch. They add a bit of crunch and with just a hint of peanut butter these cookies are super good! Today a bunch of us participated in Mormon Helping Hands, which was a service project where all the Mormons in the state of California (or at least most of us) gave four hours of service at the State Parks. Our ward painted a building at Guajome Lake Park right here in our own neighborhood. There were projects just like this one going on throughout the whole state today, and it felt good to be a part of the event. Why am I telling you this, you ask? Well, after we finished painting we had lunch and I brought these cookies and they were gobbled up before you could say lickety-split! Well, maybe before you could say lickety-split 100 times, but still, they were gobbled up fast. Go ahead and make 'em and watch 'em fly off the plate, you'll see what I'm talkin' about!

You simply must: Double the recipe! If you don't you'll be sorry and you'll be forced to get that good ol' Kitchenaid Mixer right back out and make another batch because one batch will never cut the mustard. It just won't. Double it! Oh, and I just remembered something. Years ago I doubled the recipe but didn't bake all the cookies and put some of the dough in the fridge for later. The Rice Krispies became a little soggy and the cookies weren't quite as good, so I recommend baking them all right away. And then sitting down and eating them all right away...with milk!

Hope you enjoy stirring it up!

Monday, April 19, 2010

Chocolate Peanut Butter Cookies

½ c. butter
½ c. chunky peanut butter
1 c. packed brown sugar
1 egg
1 t. vanilla extract
1 c. flour
¼ c. cocoa powder
½ t. baking soda
½ c. semisweet chocolate chips
½ c. chopped peanuts

Preheat oven to 350 degrees. Cream butter, peanut butter and brown sugar. Add egg and vanilla. Add dry ingredients; mix well. Stir in chocolate chips and nuts. Bake on ungreased cookie sheet for 12-14 minutes.

From whence it came: A really super duper amazingly great cook gave this recipe to me. The credit for this one goes to my friend Sue Burns. Sue and I were neighbors for many years before our family moved away. We shared a love of cooking, but I must admit, Sue is a much fancier cook than I am. No recipe is too difficult or too complicated for Sue, and the food she makes always looks as good as it tastes. Sue and I have shared many yum-e recipes, and this one is at the top of the list! Sue, thanks for all the great recipes, and for all the great memories, too!

Why it's blogable: These cookies are soft and really really good! You can make them big by using a quarter cup measuring cup, but if you do you will need to cook them a bit longer. Or you can just make them regular size and cook them as directed. It's kind of hard to tell when they're done because they are already brown so you can't wait until they've browned. I just touch them lightly on the side and if they seem set then they're done. They don't go flat like some cookie recipes and they are a hit whenever I make them. Oh, and like I've said before with many of my other recipes, I ALWAYS double the recipe!

Hope you enjoy stirring it up!

Tuesday, April 13, 2010

Fudgie Pudgies


Ingredients:

2 cups white sugar
1/4 cup unsweetened cocoa powder
1/2 cup milk
1/2 cup butter
1 teaspoon vanilla extract
1 pinch salt
1/2 cup chunky peanut butter
3 cups quick cooking oats

Directions:

1. In a saucepan over medium heat, combine the cocoa, sugar, milk and butter. Bring to a boil, stirring occasionally. Boil for 1 minute.

2. Remove from heat and stir in the salt, vanilla, oats and peanut butter.

3. Drop by rounded spoonfuls onto waxed paper. Allow cookies to cool for at least 1 hour.

From whence it came: We took this recipe off of the Internet somewhere, but I have no idea where we grabbed it. This is a really common cookie recipe, but this particular one turns out great every time. Every time! We used to use another one that was similar called Fudgie Pudgies but half the time they turned out really dry and crumbly. (We still call them Fudgie Pudgies for old times sake!) That recipe didn't have milk, this one does. I think the milk makes all the difference. And you'll need more milk after you make 'em because they are GOOD with a TALL, COLD glass of MILK! They look a bit like something that came out of the business end of a cow, but they taste heavenly. If you're nuts about nuts, you can add some chopped peanuts and they'll be even yum-e-r, but they're great either way! Oh, and I've made them with regular oats and they're still super good.

Why it's blogable: One great thing...no oven required. Another great thing...your kids will tell everyone they know that you are the best mother in the whole wide world if you make these for them. My kids go nuts over these babies. And The Spy Who Loves Me asked for these instead of a birthday cake last year on his birthday. Do I need to say more? I think not!

We have issues: Yes, it's true, us Andersons have cookie issues. We love them, we crave them, we dream about them, and we love to make them. That's why we almost always double this recipe. Go ahead and double it, because if you don't, you're gonna be sad.

Hope you enjoy stirring it up!

Saturday, April 10, 2010

Million Dollar Pie


Crust

* 1 refrigerated Pillsbury® pie crust (from 15-ounce box), softened as directed on box

Filling

* 1/2 cup butter or margarine
* 1/2 cup packed brown sugar
* 3/4 cup corn syrup
* 1/8 teaspoon salt
* 1 teaspoon vanilla
* 3 eggs , lightly beaten
* 4 Nature Valley® Oats 'n Honey crunchy granola bars (2 pouches) crushed. To easily crush granola bars, do not unwrap. Use rolling pin to crush bars.
* 1/2 cup chopped walnuts
* 1/4 cup quick-cooking or old-fashioned oats
* 1/4 cup chocolate chips
* Whipped cream or ice cream , if desired

Directions:

Heat oven to 350°F.

Place piecrust in 9-inch glass pie pan as directed on box for One-Crust Filled Pie.

In large microwavable bowl, microwave butter on high 50 to 60 seconds or until melted.

Stir in brown sugar and corn syrup until blended. Beat in salt, vanilla and eggs.

Stir crushed granola bars, walnuts, oats and chocolate chips into brown sugar mixture. Pour into crust-lined pan.

Bake 40 to 50 minutes or until filling is set and crust is golden brown. During last 15 to 20 minutes of baking, cover crust edge with strips of foil or pie shield to prevent excessive browning.

Cool at least 30 minutes before serving. Serve warm, at room temperature, or chilled with whipped cream or ice cream.

Store in refrigerator.

From whence it came: This recipe won the million dollar prize in the 2004 Pilsbury Bakeoff and I saw it made on Oprah's show way back then and just had to try it.

Why it's blogable: Any pie that wins a million dollars, and this one really did, is blogable! This pie is really really good, and very easy to make. Here's a little secret that it pains me to admit, I'm not a good pie crust maker. Nope, I'm just not. It's something I need to work on. Lucky for me my friend Marie Calendars makes really good frozen pie crusts. That's what I always use when making this recipe. This is a huge favorite of the teen son. He can make this one all by himself, and he has. Sometimes he begs me to make it, and like the great mom I am, I use it as leverage to get him to do just what I want. And it works!

Hope you enjoy stirring it up!

Monday, March 22, 2010

My Favorite Brownie Recipe


Sand Art Brownies


In large bowl combine:

2 ¼ cups sugar

2/3 cup cocoa

½ cup chopped nuts

1 ¼ cups flour

1 tsp. baking powder

1 tsp. salt


Add:

¾ c. butter or margarine, melted

4 eggs

1 c. walnuts (optional, but they make them even yummier!)


Bake in greased pan in preheated oven set at 350 degrees:

Pan size Baking Time

9 x 13 - 30 minutes

9 x 9 - 50 minutes


From whence it came: At first I couldn't remember who gave me this heavenly recipe, but I'm happy to tell you that it came from my sister-in-law, Geralene Beckett. You will see Geralene's name again on this blog because some of my favorite recipes have come from her. She is a great cook, and an even better sister-in-law. They are called Sandart Brownies because it was one of those recipes you layer in a jar to give as a gift and then have the person you gave it to add the eggs and butter.


Why it's blog worthy: It's such an easy brownie recipe, and they turn out great every time. Also, it has basic ingredients and you don't have to melt chocolate because it calls for cocoa powder.


Tips: I often double the recipe to make extra thick brownies. If you double it in a 9x13 pan, cook them for 50 minutes. Also, they are amazing if you frost them with chocolate butter cream frosting. This is how I make it:


In a bowl mix:

1 box powdered sugar

1/2 c. cocoa powder (more for darker chocolate frosting)

1 cube butter

1 T. vanilla (yep, that's right, a whole tablespoon!)

Enough milk to make the proper frosting consistency. Add the milk slowly because you don't need much.


Hope you enjoy stirring it up!