Friday, January 28, 2011

Bye Bye Birdie

My baby girl, also known as my teen daughter, is right at this very minute getting ready to spread her little wings and fly out of our little nest.  I am fighting with all my might to refrain from assuming the fetal position.  I can't guarantee it's not going to happen.  I still remember saying goodbye to my now married daughter when we left her in snowy Provo to pursue her dreams a few years ago.  I cried until my eyes were swollen shut.  It wasn't pretty.  Not at all.

My married daughter had a lot of fun pursuing her dream, and her dream ended up becoming my sonny-in-law!

Now it's time to let another birdie go, and I'm not sure I'm ready. In fact, I'm pretty sure I'm not ready at all.  But these little birdies of ours grow up and inevitably they venture out into the world to find their way.   It's a good thing.  It's what we raised them to do.  It's what we worked for.  It's what we prayed for.  It's what we've wanted.  It just came way too fast.

My little birdie before:

My little birdie now:
Why am I posting this sob story on my little cooking blog, you might ask?  Because I told my baby girl aka teen daughter aka little birdie that for the week before she left she could choose any dinner she wanted each night of the week.  So, I thought I'd share with y'all what she chose:
Roast Beast and Smashed Potatoes with Gravy
Sorry there's no recipe for this one, but it is her all time favorite dinner!  Or maybe her second, Thanksgiving takes her #1 spot!

I know that's only four nights of dinners but get serious, I'm not superwoman.  You didn't think I really cooked seven nights in a row, did you?

Tonight we are having a "Have fun in Utah" party for our little birdie.  We would never call it a goodbye party.  I am not a fan of the "g" word.  For the party I asked her what she wanted and this is what she said:

UGH!  We should have known that she would pick this!  Just to torture me!  But I rebelled and we made them into cupcakes and then I made homemade frosting instead of that yucky canned stuff.  You know by now I am not a lover of store bought frosting.

Thankfully my teen son is still planted firmly in the nest, at least for another year or so.  The good news is that for now I'll still have someone to smother, oops, I mean mother.  Lucky him, now all my mothering skills will be aimed straight at this handsome boy. 
I do realize this post has a lot less to do with food and a lot more to do with my needing to let my birdie fly, but blogging is therapeutic for me, and seeing my birdies fly has caused me to need therapy.  Which reminds me, cupcakes are also very therapeutic.  Gotta run, I hear those cupcakes calling my name!

Hope you enjoy stirring it up!

Tuesday, January 25, 2011

Low Fat Carrot Cake


Cake:
9 Tbsp butter, softened
2/3 C. packed brown sugar
1/2 C. sugar
2 large eggs
2 large egg whites
2 tsp vanilla
2 C. flour
2 tsp baking soda
1 tsp cinnamon
1/4 tsp salt
3/4 C. low-fat buttermilk
2 C. finely shredded carrots   

Frosting:
4 ounces block-style fat free cream cheese*
1/4 C. butter, softened
2 tsp vanilla
1/8 tsp salt
2 3/4 C powdered sugar, divided
Orange sugar sprinkles (or whatever you have around)

Preheat oven to 350 degrees.**

To prepare cake, coat a 13x9 inch baking pan with cooking spray; line bottom of pan with wax paper.  Coat wax paper with cooking spray; set aside.

Place 9 Tbsp butter, brown sugar and granulated sugar in a large bowl; beat with mixer at medium speed 5 minutes or until well blended.  Add eggs and egg whites, 1 at a time; beating well after each addition until pale and fluffy.  Beat in 2 tsp of vanilla.

Lightly spoon flour into dry measuring cups; level with knife.  Combine flour, baking soda, cinnamon, and 1/4 tsp salt, stirring with a whisk.  Add flour mixture and buttermilk alternately to sugar mixture, beginning and ending with flour mixture; mix after each addition.  Stir in carrot.  Spoon batter into prepared pan.  Sharply tap pan once on counter to remove air bubbles.  Bake at 350 degrees** for 30 minutes or until a wooden pick inserted in center comes out clean.  Cool in pan 10 minutes on a wire rack; remove from pan.  Carefully peel off wax paper; cool completely on wire rack.

To prepare frosting, place the cream cheese, 1/4 C butter, 2 tsp of vanilla and 1/8 tsp salt in a large bowl; beat with a mixer at medium speed until smooth.  Gradually add 2 cups powdered sugar, beating at low speed until smooth (do not overbeat).  Stir in the remaining 3/4 c. powdered sugar.  Cover and chill 30 minutes.  Spread frosting over top of cake.  Garnish with  sprinkles.  Store cake loosely covered in refrigerator. 
Yield:  16 servings

Calories:  309; Fat 10.3 g; Protein 4.5g; Carb 50.2 g; Fiber 0.9g

*I have never been able to find Fat free cream cheese so I always use the 1/3 less fat ones.

**The recipe calls for the oven to be at 350 degrees, but I bake it at 300 degrees for one hour or until done.


From whence it came:  Starts with "K", ends with "erinda".  That's right, my great friend, Kerinda gets another gold star for sharing another golden recipe.  (Knowing her like I do, she's not gonna want a gold star.  She's gonna want chocolate.  She and I share a love of all things chocolate.  But all she's getting is a gold star.  And a great big thank you!)

Why it's blogable:  To be totally honest, which I always am, except when it comes to listing my weight on my driver's license, I think this carrot cake recipe is better, but it's also a lot more fattening.  So, this one is blogable because it's a lot less fattening, and still really yum-e.  No one will know it's low fat unless you tell them.  And you really shouldn't tell them, at least not until they tell you they love it, and they will.

Give it a try. 
Take it for a test drive. 
Give it a whirl. 
Take it out for a spin. 

Click here to get the printable:
Low Fat Carrot Cake

Hope you enjoy stirring it up!

Thursday, January 20, 2011

Cali Cheesesteak Sandwiches

A few nights ago we barbecued New York steak, which is my favorite steak.  We don't eat it very often, but this past week The Spy Who Loves Me and I made it to the 29 year mark in the marriage department, so we thought a good steak dinner was in order.  And it was a good dinner.  We had quite a bit of steak leftover, and it would be a sin to waste New York steak, so last night I put it to good use.  Very good use.  Here's how it went down:

I chopped up some green bell peppers and onions and stir fried them in a little bit of olive oil.

When they were getting a little bit brown and soft, I added the steak, which I had thinly sliced.

Once the meat was warmed up, I added about 1/2 c. steak sauce, like A1, only I used the Walmart brand, and it was great!

Then I stirred it up (hey, this blog isn't named Stirring It Up for nothin') and let the flavors combine.  (Sorry for the steamy picture, it was very steamy in my kitchen last night.)

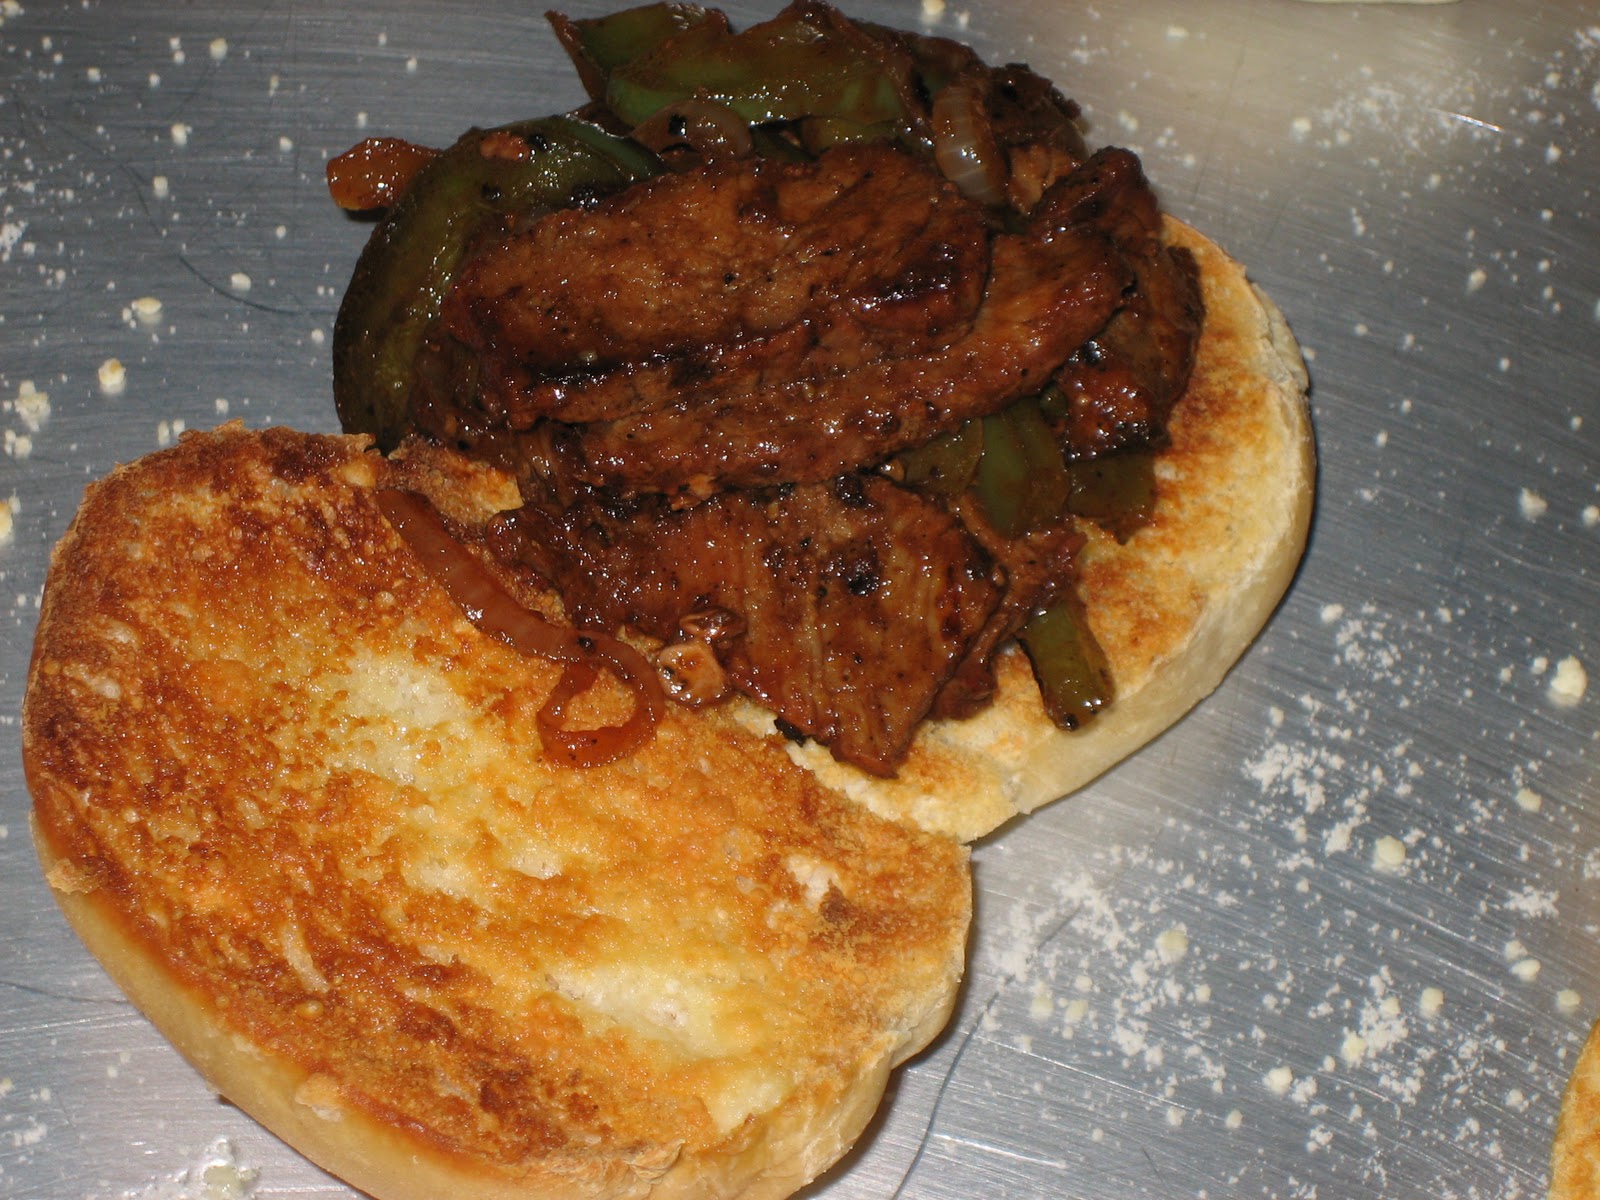
While I was doing all of that, my teen son put a little bit of butter and Parmesan cheese on some rolls and we toasted them under the broiler until they were just a little bit brown.  Then we topped the rolls with the heavenly meat mixture.  Yes we did!

And these divine little sandwiches couldn't be Cali Cheesesteak Sandwiches without cheese, so I topped them with a mix of Italian cheeses:  mozzarella, provolone, Romano and Parmesan.  Don't be overly impressed by my use of so many cheeses, they came already grated and mixed in a bag.  I shouldn't have told you that.  I should have just let you be overly impressed. 

Then I popped 'em back under the broiler for just and minute and, drum roll please, this is what happened:

Let me just say that the crowd went wild over these sandwiches.  The crowd included my marvelous momma, who was celebrating her birthday yesterday.  (I have the best mom in the whole world.  The whole wide world!)  She was a big fan of these sandwiches, and she wasn't alone.  The flavor from the barbecued steak combined with the vegies and steak sauce is over the top good.  Then you put it on that crispy, cheesy roll and add more cheese, well, you've got yourself something worth blogging about.  I named them Cali Cheesesteak Sandwiches because I'm from Cali, not from Philly.  I've never even been to Philly.  I've never even been to the right coast.  I'm a left coast girl, through and through. 

I served these sandwiches with baked beans and a fruit salad.  And for dessert, I made these cookies.  I probably should have made my mom a birthday cake, but she is crazy about these cookies, so I make those instead.  And my mom went crazy.  In a good way.  Not in a padded room kind of way.  But in a really good, thanks for making my favorite cookies on for my birthday, kind of way.

If you have leftover steak, make these sandwiches.  If you don't have leftover steak, barbecue steak and make sure you have enough to have leftovers.  Then make these sandwiches.  You'll be glad you did!

Hope you enjoy stirring it up!

Saturday, January 15, 2011

Overnight Steel Cut Oatmeal


This is more of a process than a recipe.  And here's the process:

First you need a crockpot.
If you don't have a crockpot let me know and I will begin to pray for your soul.  How can a person survive this treacherous life without a crockpot?  I shudder to think of it! 

Next you need a glass bowl.
I'm sure you have one of those.  If you don't, no amount of prayer can help.  That situation would be considered beyond help!  The glass bowl needs to be able to fit inside your crockpot with enough room around the edges to add water.

So, here's whatcha do:

Place the glass bowl in the crockpot.

Place 4 c. water, 1 c. steel cut oats and a pinch salt inside glass bowl.

These measurements make four nice size servings. 

Add enough water to crockpot to reach about 1/2 way up the inner bowl.

Basically, we've now created a double boiler using our crockpot.  How cool is that!

The inner bowl might float a little bit, but don't worry, the lid will push it back down.

Speaking of the lid, put it on the crockpot.  Plug it in.  That part is important.  You must plug it in.  And you must turn it onto low.  Then walk away, put on your pj's, wash your face, brush your teeth, say your prayers, eat a cookie, brush your teeth again, and go to bed.  (That's my nightly routine, just in case you're wondering!)

You will wake up in the morning to the creamiest bowl of oatmeal that you ever have imagined.

I put it in the crockpot at about 9:30 pm and served to the teen son at about 5:30 am.  Then I put the lid back on it and had a bowl myself around 8:00 am.  Then I put the lid back on it again and The Spy had a bowl around 9:00 am.  I tell you this not because I think you're fascinated by our morning routine, but rather so you'll know it stays warm and well in the crockpot if you eat breakfast in shifts like us Andersons. 

Now, things are about to get even better:
Sprinkle on some brown sugar and chopped walnuts or pecans.  You can also add blueberries or really anything that floats your boat.  But we're not done.  Oh no we're not.
Pour on a little bit of milk.  Or heavy cream if you don't care about heart health.  I use milk because I treasure my ticker.  Mix it all up and gobble it down!

That's all folks!  How easy is that?  If you've never tried steel cut oats, you simply must.  They are so much better than regular oats, and so very good for you.  You can buy them so cheap at a store like Henry's, or at any grocery store, but they're a lot more expensive at the grocery store.

If you don't live near a Henry's Marketplace I will pray for your soul.  I love and adore Henry's.  That's the place where I buy all my spices in bulk.  It's so much cheaper than buying them in those little containers at the grocery store.  I also buy all my nuts in bulk at Henry's.  And their produce rocks!  Steel Cut Oats at Henry's are only about .79 cents per pound.  And a pound makes a whole lotta oatmeal.  A whole lotta!

Steel Cut Oats are one of the healthiest and least expensive breakfasts you can eat.  The Spy Who Loves Me and the teen son love this stuff!  The teen daughter not so much.  She likes the little unhealthy packets of instant oatmeal that are loaded with sugar.  But she's a skinny little thing so we let it slide.

If you love your family, and I know you do, make this for them.  And they're sure to love you right back!

Hope you enjoy stirring it up!

Saturday, January 8, 2011

Tim McGraw's Chicken and Dumplings


INGREDIENTS
  • 1 small chicken
  • Water
  • 2 cups of all-purpose flour
  • Pinch of salt
  • Milk
  • 1 egg
Boil chicken, adding salt to taste. When tender, pull chicken from the bone and return to the broth.

Pour flour into a bowl, leaving a hole in the middle. Add 1 egg and enough milk to form a doughy consistency (similar to how you would make biscuits). Sprinkle flour on cutting board. Pinch off part of the dough and roll into a thin sheet and cut into squares. Drop one square at a time into broth. Continue this until all of the dough is used. Add salt and pepper to taste and simmer until tender.


Allow the dumplings to thicken the broth until it is a creamy consistency.

From whence it came:  Sigh!  Double sigh!  Sigh again!  Sorry, but I can't help myself.  I always sigh before I say (or type) the name Tim McGraw.  I love him!   I know it's wrong, considering that I am married to a spy who loves me, but if loving Tim is wrong, I don't wanna be right!  My friends make fun of me and tease me mercifully, but I don't care.  Being Tim's #1 fan is my calling in life.  And I've got the Tim McGraw earrings to prove it!

Why it's blogable:  I guess I'm going to have to confess right here and now that I've never made this recipe.  I've never eaten this recipe.  I honestly don't think I've ever tasted chicken and dumplings of any kind in my 50 years of existence.  I'm not sure I'd even like them.  Dumplings are mushy and gooey (like my feelings for Tim).  Mushy and gooey feelings are good, but mushy and gooey food is not my favorite.  So why post this recipe and break one of my major blogging rules of never posting a recipe that I've never made?  Because tonight I saw the movie Country Strong starring that hunky cowboy and now he is on my mind.  Oh, who am I kidding, he is usually on my mind.  But now he's on my mind more than usual.  

The Spy:  You might be wondering how The Spy Who Loves Me feels about my Timmy obsession.  He's cool with it.  Honest!  He really is!  He mostly just rolls his eyes and acknowledges that there's no point in fighting it.  It is what it is.  A middle aged woman with an unhealthy and at times slightly disturbing crush on a country superstar.  And to show y'all just how great The Spy really is, tonight he sat right beside me in the movie theater and held my hand as I watched my "other boyfriend" on the big screen.  I love The Spy!  And I love that he lets me love Tim, from a distance.  A long distance.  A very long distance.  No, there isn't a restraining order against me...yet!

Click here to get the printable:

Hope you enjoy stirring it up!
 

Tuesday, January 4, 2011

My Favorite Mac and Cheese


1 (8 ounce) package elbow macaroni
1 (8 ounce) package shredded sharp Cheddar cheese
1 (12 ounce) container small curd cottage cheese
1 (8 ounce) container sour cream
1/4 cup grated Parmesan cheese
salt and pepper to taste
1 cup dry bread crumbs
1/4 cup butter, melted
 
Preheat oven to 350 degrees. Bring a large pot of lightly salted water to a boil, add pasta, and cook until done; drain.

In 9x13 inch baking dish, stir together macaroni, shredded Cheddar cheese, cottage cheese, sour cream, Parmesan cheese, salt and pepper. In a small bowl, mix together bread crumbs and melted butter. Sprinkle topping over macaroni mixture.
Bake 30 to 35 minutes, or until top is golden.

From whence it came:  My wonderful friend, Kerinda, shared this recipe with me recently and boy oh boy am I glad she did!  It really is good and she is such a good girl for sharing. 

Why it's blogable:  I have made homemade mac and cheese before and I haven't loved it, but this recipe is very lovable.  I like it much better than the super saucy recipes that are made with a white sauce.  This recipe is so super easy to make, and the flavor is great.  I used sharp cheddar like the recipe calls for and I thought it made a great difference, but if you're not into sharp, use medium.  Our family gobbled this up and the boys went back for seconds!  I call that success!

One more thing:  I used Panko bread crumbs for the topping and they worked great!  Panko (Japanese bread crumbs) are made from bread without crusts and have a crispier texture.  I'm sure any bread crumbs would be good, but the Panko ones are great!  You can get them in any grocery store.  I found them at my BFF, Super Walmart!  Also, I turned the broiler on for just a minute before removing the dish from the oven, just to brown the top a little bit more and increase the crispiness of the bread crumbs.

Click here to get the printable:

Hope you enjoy stirring it up!

Wednesday, December 29, 2010

French Toast Casserole

  • 1 loaf (10 ounces) French bread, cut into 1-inch cubes (10 cups)
  • 8 eggs
  • 3 cups milk
  • 4 teaspoons sugar
  • 1 teaspoon Vanilla Extract
  • 3/4 teaspoon salt, optional

    TOPPING:
  • 2 tablespoons butter
  • 3 tablespoons sugar
  • 2 teaspoons ground cinnamon
  • Maple syrup, optional

  • Place bread cubes in a greased 13-in. x 9-in. baking dish. In a large bowl, whisk the eggs, milk, sugar, vanilla and salt if desired. Pour over bread. Cover and refrigerate for 8 hours or overnight.
  • Remove from refrigerator 30 minutes before baking. Dot with butter. Combine sugar and cinnamon; sprinkle over the top.
  • Cover and bake at 350° for 45-50 minutes or until a knife inserted near the center comes out clean. Let stand for 5 minutes. Serve with maple syrup if desired. Yield: 12 servings.
From whence it came:  Here is another wonderful recipe from wonderful Susie Cazanave.   I blogged about Susie not too long ago and told you all how marvelous she is and how blessed I am to have her as a friend.  Her French Toast Casserole is almost as marvelous as she is, but not quite!  I love you Susie!

Why it's blogable:  First of all, it's really good!  Secondly, I love recipes that you can make ahead of time and then just pop in the oven.  Another great thing about this recipe is that it's very inexpensive to make.  Yum-e, easy, cheap!  A great combo!

A little tip:  Make sure you cook this long enough so the egg is cooked all the way and it's not runny.  I cooked it in a glass dish and followed the directions exactly and mine turned out just right!

Click here to get the printable:
French Toast Casserole

Hope you enjoy stirring it up!

Wednesday, December 22, 2010

Fresh Cranberry Salad


1 qt. (24 oz.) fresh cranberries  (2 - 12 oz. bags)
2 cups sugar
1 ½ lb. red seedless grapes 
1 pt. heavy whipping cream
1/2 c. sugar
1 t. vanilla
1 cup chopped pecans, or more if desired

Grind cranberries in blender or food processor on medium.  (You don't want it in large chunks.)  Add sugar and stir well.  Place mixture in colander and drain overnight in refrigerator. 

In the morning, clean and dry grapes.  Cut in half and add to the cranberries.  Mix well.  Refrigerate at least two hours.  

Whip the cream until it is almost butter, very very stiff.  Slowly add 1/2 c. sugar and 1 t. vanilla to cream while whipping.  Add the whipped cream and nuts about an hour and a half before serving and keep in refrigerator so it gets cold. 

From whence it came:  One of the nicest, kindest, most generous people I have ever known shared this fabulous recipe with me.  Patty Sandner is the great gal who gets credit for this one.  Patty is twin sisters with another lady who is also one of the best people I know, Peggy Masterson.  Patty and Peggy are simply the best.  They are so much fun, and they have hearts the size of the great state of Texas.  They are always looking for ways to brighten the lives of others.  And they are both a huge bright spot in my life!  I can't say enough about these girls, or this salad!

Why it's blogable:  I tried this last week at a ladies Christmas dinner and I nearly passed out with delight.  It's just so fabulous, I don't really have the words to describe it.  It's pretty, it's got a crunch, it's sweet (and you know I'm all about sweet) and it's amazing.  Make this and you will become instantly popular.  More popular than you have ever imagined.  Possibly as popular as Patty and Peggy.  But don't become so popular that you no longer have time to stalk my little blog!

Click here to get the printable:

Hope you enjoy stirring it up!

Friday, December 17, 2010

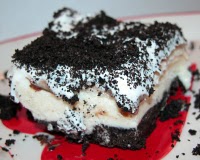
Aztec Dessert

1 package Oreo cookies
1 stick melted butter
1/2 gallon ice cream, any flavor
Hot fudge sauce
1 8 oz. Cool Whip

Crush Oreos in large zip lock bag.  Reserve 1 cup and add melted butter to remaining Oreos.  Press into bottom of 9x13 pan.  Freeze for about 20 minutes.

Top Oreo crust with ice cream.  I normally remove ice cream from carton and slice with a big knife, then place it onto the crust.  You can also soften the ice cream and spread it over the crust.

Top with hot fudge sauce that has been cooled to room temperature, then spread Cool Whip on top.  Sprinkle remaining Oreos on Cool Whip.  Place in freezer for at least one hour.  Cut into squares and serve.

From whence it came:  We all need to bow down and kiss the feet of my sweet sister-in-law, Geralane, and thank her for this over-the-top, to-die-for recipe!  She has given me many great recipes over the years, but this one stands alone.  It's amazing, just like Geralane!

Why it's blogable:  A few reasons:  Oreos, butter, ice cream, Cool Whip and hot fudge!  Can you think of a better combo?  I didn't think so.  This recipe is a hit 100% of the time.  Everyone loves it, and it's very easy to make.  It's perfect for the holidays.  If you make it with peppermint ice cream it is wonderful, and so so pretty.  The Spy Who Loves Me has over the years requested it for his birthday cake.  It's great with Mocha Almond Fudge ice cream, or cookies and cream, or mint chip, or really any flavor you like.  You can't go wrong with this recipe, unless you decide not to make it.  That would be wrong.  Very wrong!

If you want to simplify the recipe, you can buy hot fudge sauce rather than make your own.  The original recipe calls for store bought sauce.  And it's good that way, but it's better with this sauce.  And cheaper, too.  Either way, you're gonna love this recipe!

Click here to get the printable:
Aztec Dessert

Hope you enjoy stirring it up!

Wednesday, December 15, 2010

Super Secret Peanut Butter Cookie Recipe

That's right, I've been holdin' out on y'all!  In all these months I have not shared my super duper top secret peanut butter cookie recipe.  To tell you the truth, I've never shared it.  Ever.  With anyone!  But today, because it's Christmastime, and because I'm a giver, I'm giving you guys the recipe.

Here it is.  Drum roll please...
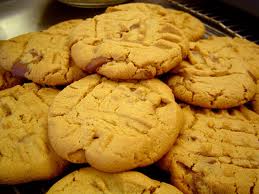
Now you probably know why I've never shared it.  Because it's totally humiliating!  How can someone with a cooking slash baking blog (emphasis on baking) use a packaged cookie mix?  Easy, I just rip it open, add the stuff it calls for, and bake 'em up!

From whence it came:  SuperWalmart!  But you can get them at any grocery store.  They're cheaper at SuperWalmart, so if you're smart, and I know you are, you'll buy them there.

Why it's blogable:  Here's the skinny...these peanut butter cookies are so good.  I'm not kidding!  I have made peanut butter cookies from scratch, and they are not better than these.  I wouldn't lie.  You know I wouldn't!  I'm always so sheepish when I make these for people and they ask for the recipe, and trust me, they almost always do.  But today I'm saying it loud and proud, "Betty Crocker rocks when it comes to peanut butter cookies."  To be honest, the other cookie mixes Betty makes aren't all that great, but when it comes to peanut butter, she knows her stuff.

A couple of tips:  I only add half the water called for because it makes the cookies taller and more puffy.  Also, I always add chopped peanuts.  I don't chop them much, I leave them in pretty big pieces.  And I add a lot of peanuts.  They are so good with peanuts!  One more thing, I use a 1/4 cup ice cream scoop to form the cookies.  It makes them really big.  Big is good when it comes to cookies.  Not so good when it comes to buns and thighs, but really good when it comes to cookies!  Oh, yeah, one more thing, I always make at least two (sometimes three) packages at a time.  If you only make one you're setting yourself up for sadness, because once you taste these you're gonna realize that one just isn't enough!

Why am I giving away this huge secret now?  Because it's Christmastime, and because even if you don't bake, you can make these cookies.  Anyone can make these cookies.  A monkey could make these cookies!  And no one will ever know you used a mix.  Unless you decide to spill your guts on your cooking slash baking blog (emphasis on baking).

Hope you enjoy stirring it up!

Saturday, December 11, 2010

Almond Roca


  • 4 sticks Butter
  • 2 cups Sugar (rounded)
  • 4 Tablespoons Water
  • 2 cups Almonds, Chopped
  • 1 cup Chocolate Chips
  • ½ cups Almonds, Finely Chopped, For Sprinkling
Combine the first 3 ingredients and cook on high, stirring constantly through 3 stages:
1. Runny
2. “Cheesy”—it will look like melted white cheese
3. Runny and smooth, caramel brown color

Make sure you have the fan on your stove going, cause you’ll probably set off the smoke alarm towards the end.
When it is runny, smooth and caramel brown in color, remove it from the heat and add the almonds. Stir until combined and pour the mixture onto greased cookie sheets. Spread it into an even layer. It will harden as it cools.

While it is still warm, sprinkle chocolate chips on top and let them melt enough to get soft. Spread the chocolate in an even layer across the candy. While the chocolate is still “wet,” sprinkle the finely chopped almonds on top.

At this point, while it is still warm and soft, you can score the candy with a butter knife to make it break evenly, or just let it harden and break it into rustic pieces.

Store in airtight containers. Enjoy!

From whence it came:  I found this winner on Tasty Kitchen!  And I'm not kiddin' ya when I say it's a winner.  Easy to make and very few ingredients.

Why it's blogable:  I'm so excited!  This is the first time I have ever had a toffee recipe turn out good.  I've tried other recipes before and they've never been the right consistency, but this time it's so good!  I'm having to use my fly swatter to keep The Spy Who Loves Me and my teen son away from the stuff.  It's a problem!

You can see the step by step instructions here.  If you've never made toffee, you should read thorough it and look at the pictures.  It helped me to know how long to cook it, and that's really the only tricky part.

Oh, one more thing, I doubled the chocolate.  One cup? I think not!  Two cups is more like it!

Click here to get the printable:
Almond Roca

Hope you enjoy stirring it up!

Monday, December 6, 2010

Eggs in a Muffin Tin

1 loaf of white bread (24 slices)
1 dozen eggs
3/4 cup milk
Shredded cheese

Spray the bottom of the muffin tins with Pam, or use variation below.  Using the ring of a glass cup (3 ½ inch diameter works best), cut the bread using the cup like a cookie cutter. Mold the bread firmly to the bottom and sides of the tin, buttered side down, if you're using butter. Mix the eggs and milk together.  Season egg mixture with salt and pepper to your liking.  Fill the muffin tin until it’s ¾ full. (The eggs will expand during cooking). Top with cheese.  You can add anything else you like to the egg mixture: sausage, bacon, green onions, green chilies, etc.  Bake at 350 until eggs looked cooked. Check around 20 minutes.  Makes 24 egg muffins.

Variation:  I buttered the bread on one side rather than spraying the pan with Pam.  They didn't stick and they tasted so good!  Also, I cut the recipe in half and made only a dozen.

From whence it came:  Someone who I love more than cupcakes gave this terrific recipe to me.  Susie Cazanave is the gal and she is just as good as it gets when it comes to people.  Susie is so sweet and kind and thoughtful and fun.  And she is truly one of the most genuine people I have ever known.  And popular!  She is so very popular!  She is loved by everyone.  Everyone loves and adores Susie, but not as much as me.  I love her the most!  She is one special lady, and this is one special recipe!

Why it's blogable:  I tried this recipe out this morning for a little ladies breakfast and it was a hit.  I was nervous to try a new recipe on company, but I knew Susie wouldn't lead me astray, and I was right!  I think buttering the bread gave them a great flavor and also made the edges nice and crispy.  I added chopped green onions but there are so many yum-e things you could add.  Use your imagination.  Make them for your family.  My teen son and teen daughter both loved them!  This is a winner guys, pinky swear!

Click here to get the printable:

Hope you enjoy stirring it up!

Friday, December 3, 2010

Bacon Wrapped Dates...the trauma!!!

Today I saw this recipe on Tasty Kitchen and it brought back a Christmas memory...not necessarily a happy one!

http://thepioneerwoman.com/tasty-kitchen/recipes/appetizers-and-snacks/bacon-wrapped-dates-2/

I thought I'd share my newlywed Christmas with the in-laws horror story with you.  It's shameful.  It's humiliating!  It's caused me to need therapy.

When I was just a young bride, The Spy Who Loves Me took me to his Aunt Ruthie's house for Christmas dinner.  Ruthie was fun.  She was one of those "life of the party" kinda gals.

Ruthie was kind of fancy, too.  She had a nice home with pretty stuff.

Ruthie was generous.  She bought me my first set of Christmas dishes for a bridal shower gift, then for years my sweet Grandma Alyce added to the set every Christmas so that now I have a serving for twelve.  How cool is that!

Getting back to Ruthie and my Christmas horror story, there I was at fancy Aunt Ruthie's house, making my way around the buffet table, choosing what I thought looked good to eat.  I made a fatal mistake that night.  I chose something dark.  Something small and dark.  It looked harmless.  So I put one of the somethings on my plate.

I went over to the couch and sat down by The Spy (remember, we were newlyweds, we always sat by each other...always!) and said in a quiet voice, pointing to the small dark thing, "What do you think this is?"  The Spy looked into my eyes (remember, we were newlyweds, we were in love, we gazed into each others eyes regularly) and he said, "It's a date wrapped in bacon."  How on earth The Spy knew this I'll never know.  He doesn't know much about food.  But he is, after all, a spy, so I guess he just knows stuff.  

Anywho, my palms became clammy and I began to break out in a cold sweat!  I had NEVER heard of such a thing.  A date wrapped in bacon.  That's just about the freakiest food combination I had ever heard of.  What on earth was I to do?  Remember, I was a newlywed!  I was still trying desperately to make a good impression.  I couldn't act like I didn't like something that they had prepared.  I was in a tizzy! 

Then, just as luck would have it, I looked down and there, right next to me, was a trash can.  All I had to do was look around, make sure no one was watching, and drop the small dark thing into the can.  Problem solved.  Or so I thought.

Here's where the horror happened.  I covertly glanced around the room, grabbed the little dark thing with my bare hands, and dropped it into the can.  Believe me when I tell you that little dark thing made the loudest sound hitting the bottom of the trashcan that you can ever imagine.  Here's the problem...the trashcan was metal and completely empty.  There wasn't a single thing in it!  And, that small dark thing, well, it was very hard, so when it hit the bottom, it made a sound that was heard throughout the room!  Most likely it was heard throughout the entire neighborhood!  Everyone turned around and asked, "What was that?"

The story ends here.  I blanked out.  I have post traumatic stress syndrome.  I vaguely remember someone looking down into the can and seeing the little dark thing down at the bottom, all by itself, and me sitting next to it, my entire face as red as Rudolph's nose.  It wasn't my best moment.  And although that was nearly 30 years ago, I remember it like it was yesterday.

I still say that dates and bacon were never meant to be together.  They are an odd pair.  Don't try to convince me otherwise.  Bacon should be on a plate with pancakes and dates should be with nuts in bread.  Speaking of which, I need to share my Grandma Alyce's Date Nut Bread Recipe with y'all.  It's so good.  Not like those nasty little dark things!

Hope you enjoy stirring it up!


Thursday, December 2, 2010

Gooey Toffee Butter Cake


Cake:
1 (18.25-ounce) box yellow cake mix
1 large egg
1/2 cup (1 stick) unsalted butter, melted
 
Filling:
1 (8-ounce) package cream cheese, softened
2 large eggs
1 teaspoon pure vanilla extract
1 (16-ounce) box confectioners' sugar
1/2 cup (1 stick) unsalted butter, melted
1 cup almond toffee bits or chocolate toffee bits
 
Preheat the oven to 350 degrees F. Lightly grease a 13 by 9 by-2-inch baking pan.
 
For the cake: In the bowl of an electric mixer, combine the cake mix, egg, and butter and mix well. Pat into the bottom of prepared pan and set aside.
 
For the filling: Still using an electric mixer, beat the cream cheese until smooth. Beat in the eggs and vanilla. Dump in confectioners' sugar and beat well. Reduce the speed and slowly pour in butter. Mix well. Fold in toffee bits.
 
Pour filling onto cake mixture and spread evenly. Bake for 40 to 50 minutes. Don't be afraid to make a judgment call on the cooking time, because oven temperatures can vary. You want the center to be a little gooey, so don't bake it past that point!
 
Remove from oven and allow to cool completely. Cut into squares. Just remember that these wonderful cakes are very, very rich, and a little will go a long way.

From whence it came:  The queen of ooey-gooey treats, Paula Deen!   I don't know how she does it, but Paula just keeps cranking out fabulous recipes.  I think her secret is BUTTER!  You just can't go wrong with butter.  

Why it's blogable:  This recipe is very similar to the Gooey Pumpkin Butter Cake recipe that I posted a while back.  I had so much great feedback on the Gooey Pumpkin recipe that I just had to post the Gooey Toffee recipe.  They are both delicious, and this one is perfect for the holidays.

You don't have to add the toffee pieces if you don't want to.  You can just make a Gooey Butter Cake.  I've done it both ways, and both were yum-e!

Click here to get the printable:

Hope you enjoy stirring it up!

Friday, November 26, 2010

Gingersnap Cookies

½ c. butter or margarine
1 c. sugar
¼ cup molasses
1 egg
¼ t. salt
2 t. soda
2 c. flour
1 t. cinnamon
1 t. ginger
1 t. cloves

Mix together – Refrigerate for 2 hours.  Roll into balls, then roll balls in sugar.  Place on cookie sheet and bake 10-12 minutes at 350 degrees.

From whence it came:  A lady who I dearly dearly love gets the props for this must make recipe.  Carolyn Boden, you are a hero to me in so many ways.  I have learned so much by knowing you.  I haven't seen Carolyn in quite a long time, but she has left a sweet stamp on my life.  And boy oh boy can she cook!  I'm gonna let y'all in on a little something that I believe with all my heart and soul.  It's not so much about being a great cook, it's more about having great recipes.  I don't claim to be a great cook, a am just a girl with some fabulous recipes.  And this one came from Carolyn.


I made a goal this year to search the world over and find the best gingersnap recipe in existence.  I was willing to go to any and all lengths to make this happen so that we could all enjoy heavenly gingersnap cookies.  Pondering how to start this worthy and noble task, I first turned to my own box of wrinkled and smudged recipes.  In there, from many many years ago, I found a piece of paper with this recipe on it, and on the paper was written the name Carolyn Boden.  Right then I knew.  I just knew.  This was going to be a good recipe.  If it's got Carolyn's name on it, it's a winner.  It's just that simple.  And I was right!  My search for the perfect gingersnap ended almost as quickly as it began, thanks to Carolyn.


Why it's blogable:  First of all, these cookies instantly passed The Spy test.  The Spy, who is always brutally honest when it comes to my cooking, was an instant fan.  These cookies are just what a gingersnap should be.  A tiny bit crispy around the edge and oh so soft and chewy in the middle.  The sugar coating gives them the perfect touch.  Also, they turn out so perfect looking.  I used my small Pampered Chef cookie scoop and rolled them into balls and each and every cookie was exactly the same size and shape.  I'll make a confession here, that hardly ever happens for me.  Usually my cookies all look a bit different.  Each is unique.  (I justify my lack of perfectionism in cookie making by saying that, but the truth is that mostly I'm to lazy to make them all exactly the same.)  But I did make an effort on these to make them all the same, and it was worth it.  


Just in case you're not convinced, I'll tell you one more reason these gingersnaps are blogable.  We are spending Thanksgiving with my married daughter and sonny-in-law in the fabulous town of Park City, Utah.  I made these cookies to bring to Thanksgiving and was very excited to have my married daughter try them.  I offered one to her, and she kind of gave me the thanks but no thanks look.  I resisted the urge to lay down on the floor and kick my hands and feet while crying and wailing and instead I insisted she try one.  One bite was all it took.  She was hopelessly and eternally in love.  And just trust me guys, you will be too.


Start this magical Christmas season off right with a new recipe that will put a smile on the faces of those you love.  And isn't that what Christmas is all about?  


Hope you enjoy stirring it up!
Pam

Monday, November 22, 2010

Pomegranate Jello

1 large package cherry jello (regular or sugar free)
1 large pomegranate
2 ripe bananas
Cool Whip (if desired)

Make jello according to directions on box.  Put in fridge until fully set.  Using a wire whisk, break up the jello.  Stir in the remaining ingredients.  Add as much Cool Whip as desired.  I like about 1 cup but you can add more, less or none at all.

From whence it came:  The credit for this most fabulous of all jello recipes goes to either me or my mom.  I can't remember which one of us thought of it first.  We both love, cherish and adore pomegranates.  They are at the top of my "foods I just can't live without" list.  Unfortunately I am forced to live without them about 10 months out of the year because they are only in season around the holidays.  And that, my friends, is just one more reason to love the holidays.

Why it's blogable:  I am not fibbin' when I tell you that every time I make this jello people go nuts for it.  It's just the best jello you will ever eat, and it's super pretty!  You might be thinking that pomegranates are a pain to deal with, and you'd be a little bit right, but they are so worth the trouble.  You can pull them apart in a bowl full of water and avoid the squirts and stains caused when you deal with them.  Me, I like to sit with a big towel on my lap and just go at it.  (Pomegranates do stain, so be careful and don't wear your favorite cashmere sweater when dealing with them.) 

My teen son and I will sit together and devour an entire pomegranate.  He is also a lover of this heavenly red fruit.  And pomegranates are super duper healthy.  They are loaded with fiber and are rich in antioxidants that can keep bad LDL cholesterol from oxidizing.  Bet you didn't know I was such a smartie about this stuff.  I'm really not, I just Googled it to prove my point.

The best pomegranates are available at Costco.  They can be a bit pricey, but they are worth every cent.  Oh, and another favorite thing I do with them is put them on cold cereal, like granola or Honey Nut Cheerios or my very favorite cereal on the planet, Just Bunches!  It's the best!  I'm drooling just thinking about it.  Buy them!  Eat them!  Make this jello! 

Click here to get the printable:
Pomegranate Jello

Hope you enjoy stirring it up!

Tuesday, November 16, 2010

Terri's Sweet Potato Casserole


3 cups (about 3-4 whole potatoes) cooked and mashed sweet potatoes  
   (I like to bake them and I use a mixture of the yellow and the orange kinds.)
½ c. melted butter
½ c. evaporated milk
2 eggs, well beaten
1 t. vanilla

Mix all of the above and put into a 2 qt casserole dish.  

Mix together:

½ c. brown sugar
2 ¼ T. butter, softened
½ c. chopped nuts - I use pecans

Spread this topping onto casserole.
Bake at 350 degrees for 20-30 minutes.

From whence it came:  A wonderful gal named Terri Johansen shared this terrific recipe with me.  Terri is so great!  She is one of those people who does everything perfectly!  She is a true perfectionist.  Her home is decorated so pretty, and she cooks some really good stuff!  One time she made this pumpkin roll that was so fancy and really yummy!  Terri is wonderful and very generous to share this recipe just in time for the holidays!

Why it's blogable:
  Here's the deal - I'm breaking one of my blogging rules with this recipe.  I said that I wouldn't post recipes I hadn't made myself, and it looks like I lied a little, because I've never made this casserole.  But, before you click off of my blog and run to The Pioneer Woman or my BFF Paula Deen, you should know that I was at a party a couple of weeks ago and everyone was raving about these sweet potatoes.  They couldn't stop talking about this recipe.  I knew right then and there I just had to have it.  And, because Terri is so sweet, just like her sweet potatoes, she gave it to me.  And because she is so generous, just like the size portion I plan to eat of these on Thanksgiving, she said I could share the recipe with y'all!  So I did.  And you're welcome!

Click here to get the printable:

Hope you enjoy stirring it up!

Friday, November 12, 2010

Unfussy Rolls

1 cup whole milk
½ cup butter
½ cup granulated sugar
¾ tsp salt
3 eggs
1 tbsp dry yeast +1 tsp sugar
4 cups white flour

In saucepan heat milk, butter, sugar, and salt until scalded.  Let cool to lukewarm.  Add eggs and stir.  Dissolve yeast and 1tsp sugar in ¼ cup warm water.  Add yeast to milk and add four cups white flour.  Don’t over mix - treat like muffins.  Let rise until double in bulk.  Shape into rolls*.  Let rise again and bake 10-15 minutes at 350 degrees F.  These can be stored overnight in the refrigerator, let warm to room temp 20 minutes before baking. 

*I usually divide the dough into two portions and roll each portion into a circle about ¼ inch thick (use flour as necessary to prevent sticking).  You can brush the dough with melted butter at this point if you wish.  Cut into 12 wedges.  Starting at the end opposite the point roll the wedge into a crescent and curve the ends.  Place on ungreased cookie sheets with the point on the bottom to keep it from unrolling.

From whence it came:  One of the very best cooks I know, Janice Luncford, shared this terrific recipe with me.  These rolls are really tasty, and they're very easy to make.  Perfect for the holidays, perfect everyday!  Just like Janice!

Why it's blogable:
  Today I made jam with my friend, Kerinda.  We made lots of jam.  A whole lot of jam.  We made four kinds of jam.  I'm tired from making jam.  And from licking my fingers.  And from licking the bowls.  And from licking the spoons.  It was impossible not to lick because each batch was so good!  We made red raspberry, blueberry, strawberry, and apricot strawberry.  I can't decide which one is my favorite.  I think it's whichever one I happen to be eating at the moment.  

I don't want to sound like a snob, but I need to tell you I almost never, pretty much never ever buy store bought jam.  It's just not that good, and once you make your own, store bought is second best, by a long shot!  Homemade jam is not that hard to make, and it's worth the effort!

What does this have to do with rolls, you might ask?  Well, after we made the jam, we were so sad we didn't have any homemade rolls to spread it on.  We put it on store bought English muffins, and it was good, but not as good as it would have been on Janice's Unfussy Rolls.  And then I realized I've never posted this yum-e recipe, and now seemed like the time to do it.  Right before Thanksgiving.  Right before Christmas.  But don't wait for a special occasion to make these, make any occasion special with these delicious rolls!

Click here to get the printable:

Hope you enjoy stirring it up!